


Share
There’s no need to spend thousands of dollars on equipment to achieve a professional quality video — that just requires an iPhone.
Here’s how to make your photo quality better and properly use iPhone video settings to enhance your video content.
Best iPhone Camera Settings
Since the release of the iPhone 7 in 2016, which brought better image processing chips, a double lens, and the ability to create files with more data, iPhone users carry high-quality cameras in their pockets. As new models continue to boast new features, the ability to shoot professional footage on demand is increasing.
If you have an iPhone 7 or newer, here are the main settings to adjust to optimize your videos:
Choose 4K Resolution
Video resolution refers to the clarity and detail of the image. It’s measured by the number of pixels on screen, with a higher number leading to a sharper image. Recording in standard definition (around 480p) or HD (720p) might save you storage space, but your footage will be lower quality.
Since the release of the iPhone 6S in 2015, iPhones have been capable of shooting in 4K resolution. High-resolution options like 2K or 4K have up to four times more pixels than standard HD footage and produce much better video. Just note that shooting in a resolution this high requires a lot of storage because there’s so much data.
It’s easy to switch back and forth between resolutions when you’re filming. Open the camera app on your iPhone, then switch to the video setting. In the top-right corner of your screen, you’ll see the letters “HD.” Simply tap on it to switch to 4K, and tap again to switch back.
24 Frames per Second
Frame rate, or the number of individual images displayed per second in a video, is another setting to adjust for improved video quality.
The default frame rate for most smartphones is 30 frames per second (FPS), which is ideal for sports or fast-paced action scenes because it captures the details of rapid movement. Shooting in 24 FPS is better for narrative filmmaking and is the standard for most motion pictures because it provides a more natural look. To create the aesthetic of a professionally filmed movie, switch to 24 FPS whenever you aren’t capturing rapid movement.
Apple introduced the ability to change frame rates with iOS 14, which runs on models as old as the 6S. Select your frame rate by opening the video app and tapping the number next to the resolution in the top-right corner. Most iPhones allow you to switch between 24, 30, and 60 FPS.
Enable the Grid
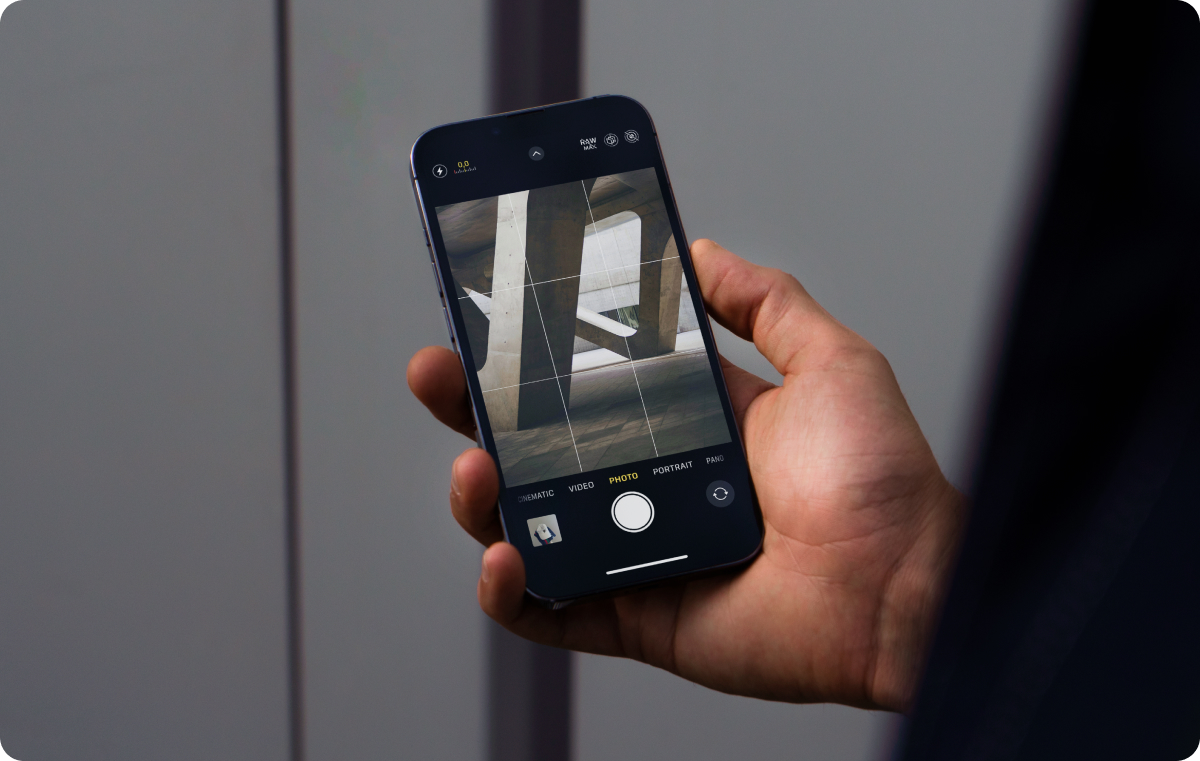
The main camera settings page has an option to turn on “Grid,” which shows two vertical lines and two horizontal lines dividing your camera screen into nine equal parts. These lines help you frame subject matter using the rule of thirds.
The rule of thirds is a composition guideline that helps draw viewers’ eyes to subjects. Try to keep your subject in the crosshairs — the four points where these rectangles intersect — to balance your focal point with the negative space in the shot. This is one of the best iPhone camera settings for anyone trying to shoot more interesting content, and it applies to any model.
Use iPhone’s Cinematic Mode
Cinematic Mode simulates the shallow depth of field popular with professional cinema cameras, meaning your subject is in focus while the background is blurry. This is most useful if you want the subject of your video to appear separate from its surroundings or you’re trying to shoot something in great detail, like a portrait shot or close-up of text.
Think of Cinematic Mode as a tool for select shots rather than a feature that should be turned on most of the time. The level of detail creates an artificial effect, potentially taking viewers out of the story. Balance your Cinematic clips with B-roll or landscape shots for a more natural viewing experience.
To get the most out of Cinematic Mode, adjust the background’s blur by modifying the faux aperture scale on the right side of the screen.
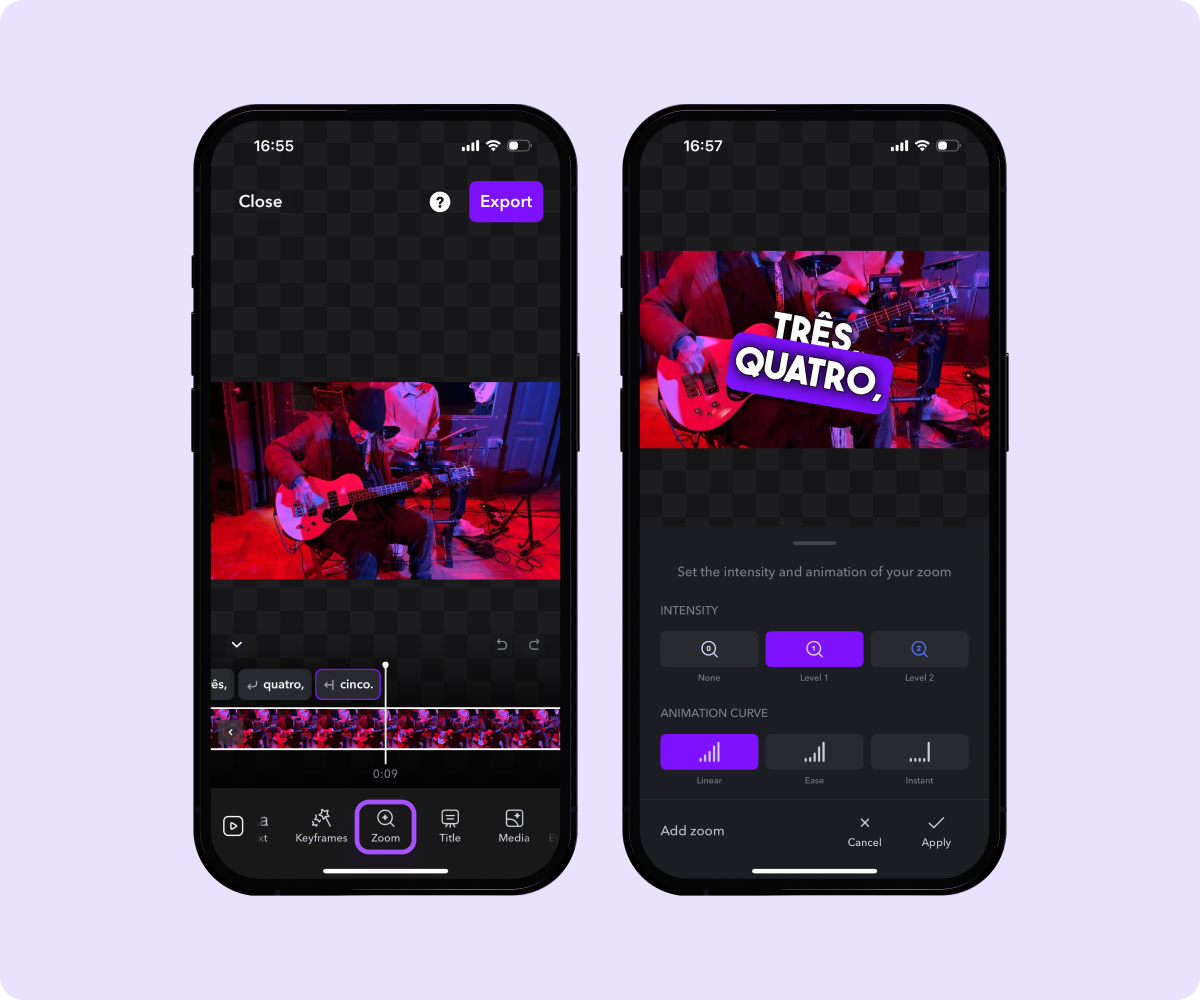
Another option is using an AI tool to help create your close-ups, like Captions. The AI Zoom feature adds relevant zooms to shots from your videos where they fit, cutting editing time and saving you from flipping from Cinematic to standard mode while filming.
Turn off HDR
iPhone cameras' HDR (High Dynamic Range) feature combines multiple exposures of the same scene to attempt to balance the contrast between the darkest shadows and brightest highlights. This is helpful when brightness levels vary a lot, such as an outdoor setting with strong sunlight.
However, HDR footage could look washed out, especially when it comes to skin tones. This results in an unnatural appearance that detracts from the realism and quality of your video. Experiment with HDR if you’re filming in a location with inconsistent or poor lighting, but keep the feature turned off unless you need it.
By default, iPhones shoot photos and videos in HDR, so here’s how to turn off HDR on your iPhone, depending on the model you have:
For iPhone Xs, Xr, 11 models, SE, and 12
- Go to your Settings app.
- Open the “Camera” settings.
- Scroll down to “Smart HDR” and turn it off.
- Then, when you’re in the Camera app, you can turn it off or on.
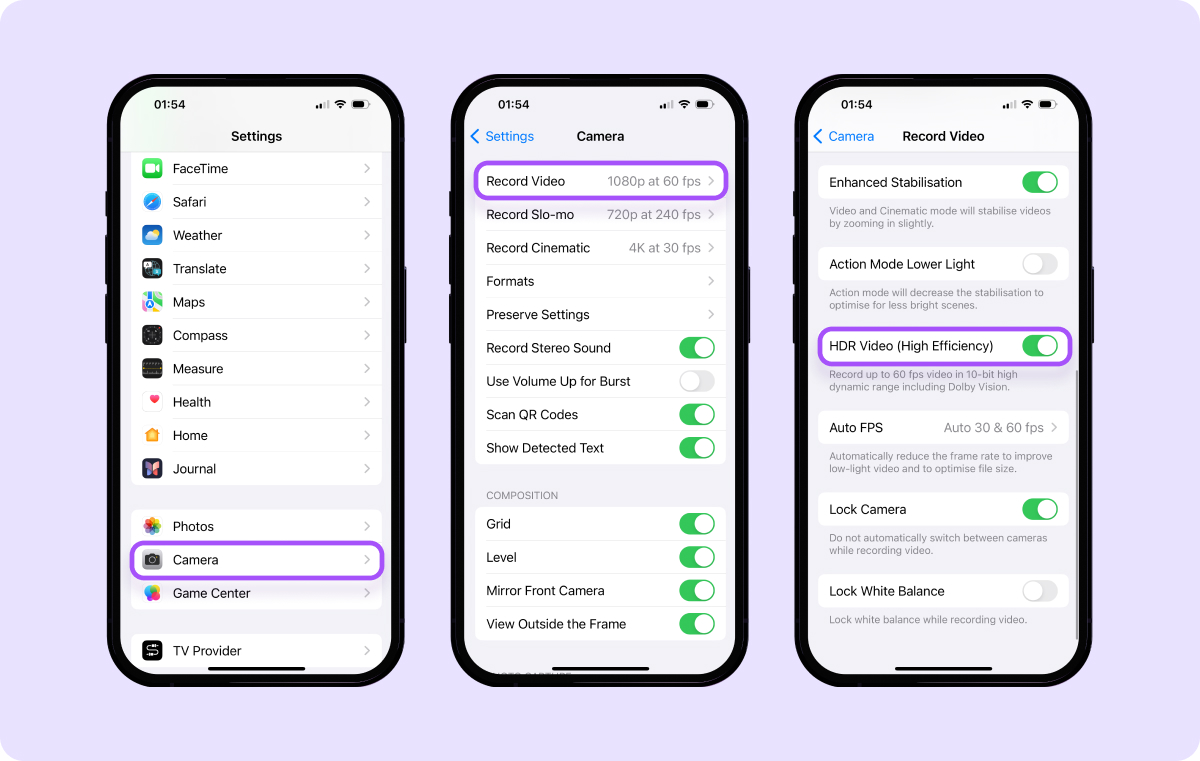
For iPhone 12 models, 13 models, 14 models, 15 models
- Go to your Settings app.
- Open the “Camera” settings.
- Tap “Record Video” at the top, then scroll down and toggle off “HDR video.”
FAQs
How Do You Record on an iPhone?
If you want to record on an iPhone, tap the Camera app. You’ll have to switch to Video Mode by swiping left or right on the screen to the “Video” option. Then tap the Record button or press either volume button to start recording. Stop recording by tapping the Record button again.
You can also start and stop recording by pressing either of the volume buttons on the side of the phone.
How Do You Change iPhone Camera Settings?
To change iPhone camera settings, head to your Settings menu, then tap the Camera option. This menu has a range of advanced camera settings to experiment with, including camera resolution, View Outside Frame, and HDR.
You can also adjust several iPhone camera settings from within the Camera app. Tap on the Resolution or FPS figures in the corner of the screen to adjust them. Swipe up to adjust exposure or enable the flash or Action Mode.
What Is View Outside Frame?
“View Outside Frame” on iPhone is an advanced camera setting that only shows what your camera is actually recording. Turning View Outside Frame on shows additional footage on your screen around the frame being recorded.
Some people find View Outside Frame distracting when they’re trying to properly frame a video, while others find it helpful to see what details they’re cropping out of frame. Try recording both ways to see if it’s useful to take better shots for your projects.
How Do You Slo-Mo a Video on an iPhone?
To record a slow-mo video on iPhone, go to your Camera app. Swipe left to find the “SLO-MO” option, then adjust the resolution and frame rate to improve the video quality while recording in slo-mo. Either 120 or 240 FPS usually capture the most detail possible.
Note that iPhones let you convert slo-mo footage to normal speed, but you can’t currently slo-mo a normal-speed video without external editing software.
Perfect Your iPhone Videos With Captions
Adjusting iPhone video settings helps you create high-quality videos that look like they belong on the big screen, but the right editing tools enhance your content even more. Captions AI tools help the creative process by saving you editing time and carrying out tasks like adding zoom effects, compressing large video files, or trimming unnecessary pauses. Start editing with Captions today.
By
April 25, 2024
-
7
Min Read
Stay in the loop
Subscribe to our newsletter and get all the news from Captions. No spam, we promise.
Oops! Something went wrong while submitting the form.
Professional videos made easy