


Share
Product photography highlights textures, colors, and details that influence buying decisions. Whether you’re showcasing apparel, gadgets, or handmade goods, high-quality images help customers imagine the product in their hands and move them closer to purchase. AI tools can streamline this process, letting you create high-quality images without a full studio setup.
In this step-by-step guide, you’ll learn how to shoot compelling product photos and explore top editing tools to elevate your visuals.
What is Product Photography?
Product photography captures stills that show your product in the best light, helping customers understand how it fits into their lives by displaying it in real-world settings. These images appear everywhere your brand does, from online stores and social posts to marketing materials and ads. They’re key to showcasing your brand identity, shaping how customers see and connect with your business. This visual storytelling is especially critical in e-commerce, where buyers can’t try before buying.
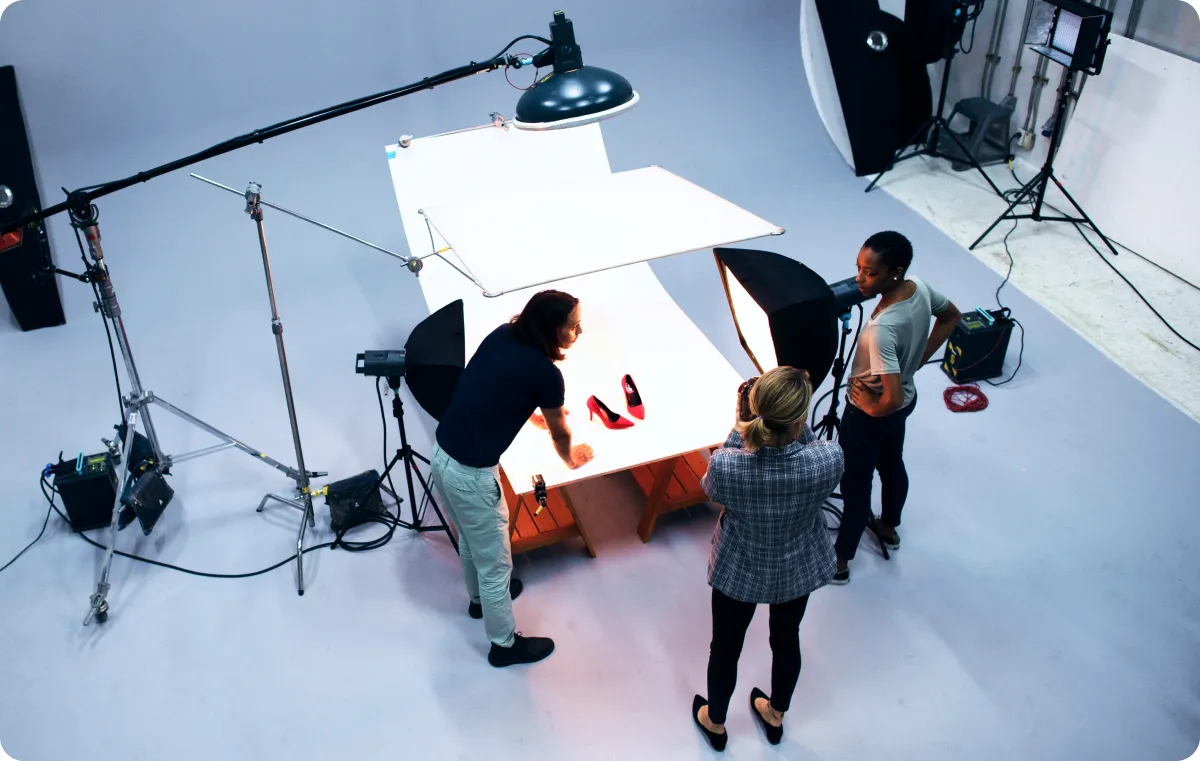
There’s no optimal product photography setup — you can take strong shots with a smartphone or invest in professional gear and lighting. The right approach for you is the one that delivers sharp, compelling images without overcomplicating your workflow.
How To Take Good Product Photos: Basic Tools
Producing effective images starts with having the right product photography equipment. Here are basic tools to build your kit.
Camera
You don’t need the latest DSLR to get great product shots — modern smartphones are often more than capable. The key is having a camera that can focus clearly and shoot in high resolution, so look for one with at least 12 megapixels. The higher the megapixel count, the sharper and more detailed your images will be.
Lens for product photographs
If you can change lenses, a 50mm prime lens is a solid choice. It closely mimics the human eye and can produce natural-looking shots. A macro lens is designed for extreme close-ups and can highlight fine details and textures on smaller items, like jewelry and cosmetics.
Tripod and shutter
A tripod stabilizes your camera to capture sharp photos. It’s especially crucial in low light or during long exposures when even slight movement causes blur. Using a remote shutter or timer can further reduce blurriness, letting you trigger the shot without touching the camera. Together, these tools ensure consistently crisp images that showcase every detail.
White or clean background
A plain white background draws attention to your product by removing visual clutter. This simplicity creates a professional look that works well across online stores and social media feeds. To achieve a clean background, use materials like a smooth poster board or sheet of fabric.
Lighting
Lighting shapes how your product appears. Soft, natural lighting provides even coverage, which is ideal for light or textured items. Indoors, diffusing harsh light softens shadows and reduces glare — LED bulbs or softboxes can help. Position your light sources at a 45-degree angle for balanced, well-lit shots.
How To Take Product Photos on a White Background: 4 Steps
White backgrounds keep the focus on your product and give your photos a polished, professional feel. Here are four simple steps to achieve this look.
1. Conceptualize your idea
Get creative with your marketing — decide on the mood or style you want, whether it’s bright and fresh or sleek and modern. This choice will guide your lighting, props, and overall approach, aligning your product with your brand’s story.
2. Set up your workspace and lighting
Shoot near a window for natural light — this makes colors pop and shadows gentle. If natural light isn’t an option, use artificial lights like desk lamps or affordable LED panels. Arrange them so your product is evenly lit, avoiding harsh shadows or bright spots. Set up a clean background, like a smooth white sheet or poster board, to help your product stand out without distractions.
3. Prepare your camera settings
Use manual mode on your camera to fine-tune exposure, aperture, and ISO. Set a low ISO (100–200) for clean, noise-free images and an aperture around f/8 to balance sharpness and depth of field. Adjust exposure to keep your photos bright.
4. Shoot and edit your photos
Take multiple shots from a range of angles and distances. Review them and pick the best ones, then edit to perfect brightness, contrast, and color balance. Crop tightly to keep the focus on your product and eliminate clutter.
How To Edit Your Product Photos for Social Media: 3 Tips
Social media is a great place to showcase product photos because it offers broad reach and authentic engagement. Editing your images with careful attention to framing and style will help you grab your audience’s attention quickly. Here are three tips to get started.
1. Crop and frame for social platforms
Social platforms prefer specific photo sizes and aspect ratios to display images consistently. For example, Instagram favors square or portrait shots, TikTok mainly uses vertical formats, and Facebook supports landscape and portrait orientations. Cropping your photos to match these layouts ensures your product looks its best without awkward framing or empty space.
2. Get creative with AI tools
AI editing tools simplify your workflow by automating tasks like retouching lighting and applying color variations, making it easier to polish your photos without expert skills. You can also add creative elements like graphics, text overlays, or branded designs to make your images stand out. These additions reinforce your brand identity and encourage viewers to engage with your content.

Add product images to videos
Combining product photos with video content creates a fuller experience, appealing to users who seek more context or information. With tools like Captions’ Product Video Maker, you can showcase your product’s key features, create ads, and customize avatars without a costly studio setup.
Create variations with different backgrounds and styles
AI tools can quickly generate multiple versions of your original product photo, with different backgrounds, lighting styles, or scene settings. This is especially useful for social media, where variety and freshness keep content engaging. For example, using prompts, you can place your product in seasonal or themed environments, match your visuals to a campaign’s color palette, or test different aesthetics to see what resonates with your audience. Experiment with your prompt format to see what garners the best results.
Reinforce brand identity
Including your watermark and product name on your photos makes them more informative and strengthens your brand’s presence. Since social media users often scroll quickly, additional branding elements help viewers grasp your message at a glance, making your content more memorable and boosting brand recognition. For marketing teams, AI image enhancements should be a key part of business strategies.
3. Export in the correct format
Always export your edited photos and videos in formats optimized for social media to balance quality and loading speed. High-resolution files look sharp but can be large and slow to load, so aim for formats that compress images without losing detail. Properly formatted files load faster, prevent pixelation, and ensure a smooth experience across devices and platforms.
Easily Generate AI Product Photos With Captions
If you don’t have the time or equipment to shoot product images, Captions can help. Using our realistic image generator, just type what you want, and the AI will create lifelike product shots in seconds. Customize details like lighting and backgrounds without needing any design skills. It’s fast, easy, and delivers natural-looking visuals to make your products stand out.
Try Captions today and bring your imagination to life.
By
July 9, 2025
-
7
Min Read
Stay in the loop
Subscribe to our newsletter and get all the news from Captions. No spam, we promise.
Oops! Something went wrong while submitting the form.
Professional videos made easy